Lemur Query Log Toolbar - Client Documentation
Version 2.1 - FireFox AddOn (for Firefox 2.0+)
[« Back to Query Log Toolbar Homepage]
The Lemur Query Log Toolbar (version 2.1) is a client-side add on for FireFox (version 2.0 and higher) that will log any URLs visited, the times the pages were viewed, any textual copies to the clipboard, and search results from major search engines (at the moment, this includes Google, Yahoo!, and MSN / Live; as well as Google Desktop Search results).
Contents
- Notes on Privacy
- Installation
- The Query Log Toolbar
- Uploading Data to a Query Log Server
- Options and Settings
- Blacklist Items
- Search Engines
Notes on Privacy
During the normal course of browsing online, it is possible that you may search for or go to URLs that may contain certain sensitive information such as your phone number, address, or even your social security number. Although subject to your view of personal privacy, you may not want these sensitive items to be logged. To this effect, we have implemented in some privacy regards to the query log toolbar.
The toolbar allows the user to setup phrases and items that can be "blacklisted" - that is, if a URL, copied text, or search result has the found blacklisted item in it, the matched item will be replaced by the generic text "##--##". Blacklisted items are typically phrases (such as "Lemur Project"), proper names ("John Smith") or other personally identifiable information such as phone numbers, social security numbers, credit card numbers, or drivers' license numbers. More information on setting up items on the blacklist are detailed below. Also note that the items set up in the blacklists are stored on the client's computer, but are encrypted to help ensure the security of these items.
In addition to the blacklisted items, from the general tab in the "Settings" dialog, the user can also choose to generate a random session ID when they choose to upload data to the server. This helps prevent aggregate log data from being tied to a single user and helps to obfuscate the queries and URLs that the user has visited so that it is much harder to tie results from one session to another, effectively preventing a malicious user of the data to string pieces together to try and establish the user's identity.
Installation
To install the add-on, download the file from the Client Software link from the file on SourceForge at: http://lemur.sourceforge.net/querylogtoolbar/querylogtoolbar.xpi
Your FireFox browser should ask you to install the add-on. If you choose so, you may save the file ("querylogtoolbar.xpi") somewhere to disk and either drag the file into your browser window, or, open the file via menu items "File" -> "Open File" and browse for the file that you downloaded.
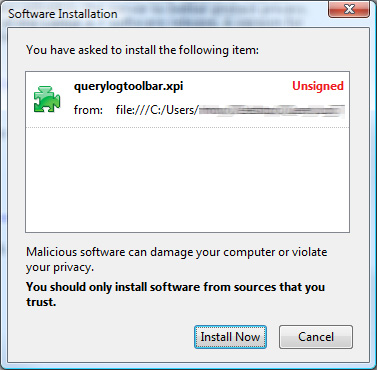
When installing the add-on, FireFox will display the "Software Installation"
dialog box (as shown below). Press the "Install" button to install
the add-on. After installation, FireFox will need to be restarted.
The Query Log Toolbar
Shown below is a FireFox browser window with the toolbar installed:
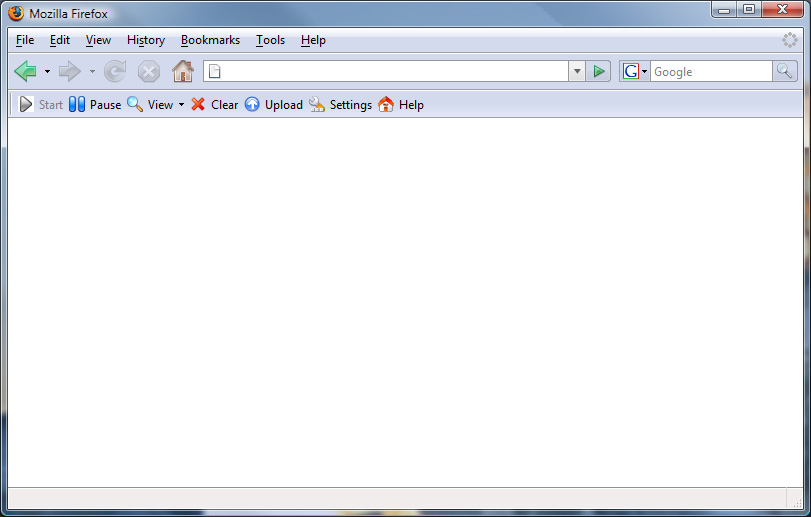
The toolbar has seven buttons on it:
- Start: Tells the toolbar to begin logging data (if it is paused)
- Pause: Tells the toolbar to pause logging of data
- View: Views the current activity and search results logs
- Clear: Clears any log data from the activity and search results logs
- Upload: Uploads the current activity and search results logs to a Query Log Server and then clears the current log files
- Settings: Brings up the settings dialog box for modifying the logging options and setting blacklist items
- Help: Takes you to the Query Log Toolbar main page online
The start and pause buttons gives the user control over when logging should be enabled. By default when a new browser window is opened, the toolbar will start logging. At any time, the user can press the "Pause" button to suspend logging of any URLs visited, text copied, and search results. Press the "Start" button to resume logging of these items.
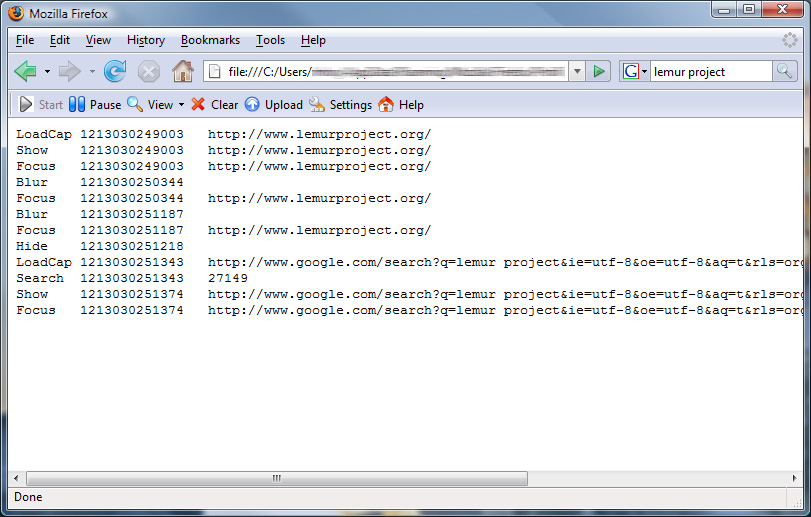
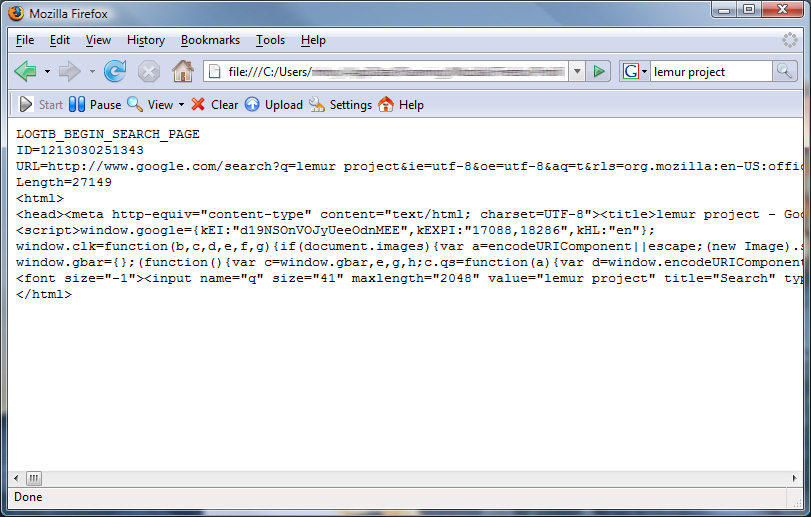
You can use the "View" button to review the log files for the
activity and search result logs. The activity logs will show all page
loads, views, copied text, and search queries. The search result logs will
display any search results gathered from major search engines (Google,
Google Desktop, MSN and Yahoo!). This allows the user to review the log
files before they are ready to upload to a query log server. An example of
view the activity log file and the search results log is shown below:
At any time, you can press the "Clear" button on the toolbar to completely clear out the current activity and search results logs. When pressed, a confirmation dialog will appear to ensure that you want to erase the logs at this time, and if confirmed, this cannot be undone.
Uploading Data to a Query Log Server
When you are ready to upload your log files to a query log server, press the "Upload" button on the toolbar. The toolbar will confirm that you are in fact ready to upload. If confirmed, the toolbar will contact the query log server (as defined in the settings options) - if no server is defined, it will ask for one at this time.
Before sending data to the server, the log files are scrubbed once more to ensure that all blacklisted items are properly filtered out. The toolbar then attempts to open a connection to the query log server and the files are uploaded.
Upon successful completion, the current set of log files on the client's machine are cleared.
Options and Settings
Pressing the "Settings" button on the toolbar will bring up the
general settings dialog box as shown below:
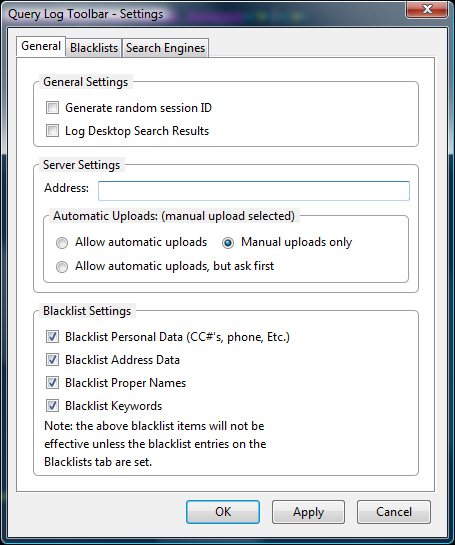
On the "General" tab, the user has the option to generate a random session ID so that when the log files are uploaded, this random ID (generated every time the log files are uploaded) is used instead of the unique user's profile ID.
You also have the option to log any search results that come from using the Google Desktop application. If you choose not to log these search results, uncheck the checkbox next to "Log Desktop Search Results".
The server address should be set to the query log server's URL. For example,
if a query log server was running on the same machine as the Lemur Project
website, but on port 8084, the server address would look like:
http://www.lemurproject.org:8084/
Of course, you will want to set this address to wherever your query log server is located. This field is optional for browsing and can be left blank until you are ready to upload results to a query log server. Even if the server address is blank, all blacklist items will still filter properly.
Starting with version 1.9 of the toolbar, we have added an option to automatically upload log files to a server. When automatic uploads are active, you can choose to have them be processed automatically, or, you can have the toolbar ask you if you are ready to upload. You can also choose to override this option by selecting "Manual uploads only". Note that automatic uploads will occur only when there is a server address filled in.
The four checkboxes on the bottom-half of the general settings tab allow the user to selectively turn on and off the four different blacklist filters. Note that the blacklist filters will only be effective if there are items entered into the blacklists themselves (see the next section for more detail). Also, depending on the configuration of the Query Log Server, the server administrator may not allow these items to be turned on or off. This is a server-side configuration item that allows the researchers running the query log servers to ensure that they collect the data they want (i.e. if a researcher is performing some experiments on logging certain people's names, they may not want the end-user to filter out any proper name items).
Blacklist Items
On the "blacklist" tab of the settings dialog box, the user
can enter in various items to be filtered (or "blacklisted")
from the logging. The main blacklist settings dialog box is shown below:
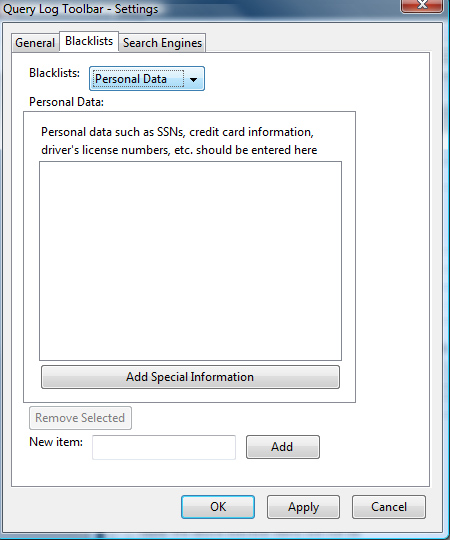
Note that there are actually four separate blacklists that are available (which can be selected via the "Blacklists:" drop down box.
These blacklists include "Personal Data" (for social security numbers, phone numbers, etc.); "Address Data" (for storing address information); "Proper Names" (for storing proper name data); and "Keywords" (general keywords to filter on).
Use the dropdown box to select which blacklist you wish to add or modify. The currently blacklisted items will be displayed in the list box in the center of the dialog.
To add a new item to the selected blacklist, enter the phrase to be blacklisted in the "New Item" textbox and press the "Add" button. The item will be included in the list.
To remove an item from the selected blacklist, highlight the item in the list box, and press the "Remove Selected" button.
On the "Personal Data" blacklist, there is an additional button
(shown above) for adding special information. When this button is pressed,
a "Special Information" dialog will appear (shown below):
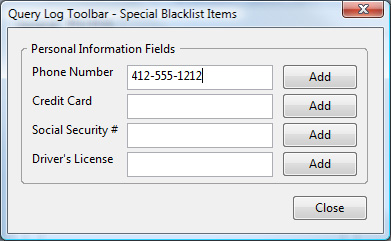
This dialog box will allow you to enter in phone numbers (both US and International), credit card numbers, US Social Security Numbers, and US Drivers' License information. When you enter in one of these items and press the "Add" button next to it, behind the scenes in the toolbar, the input will be converted to a regular expression pattern to help catch common instances of that item. For example, in the screenshot above, the phone number "412-555-1212" is entered. When the "Add" button is pressed, behind the scenes this is transformed into a pattern that will also match "412.555.1212" or "(412) 555-1212", and also several other common forms of phone number patterns.
Note that changes to the blacklists will only be saved when the "Apply" button or the "OK" buttons are pressed.
Search Engines
The third tab on the settings screen allows you to decide which
URLs the toolbar will watch for to provide logging of search
engine results. The dialog box is shown below:
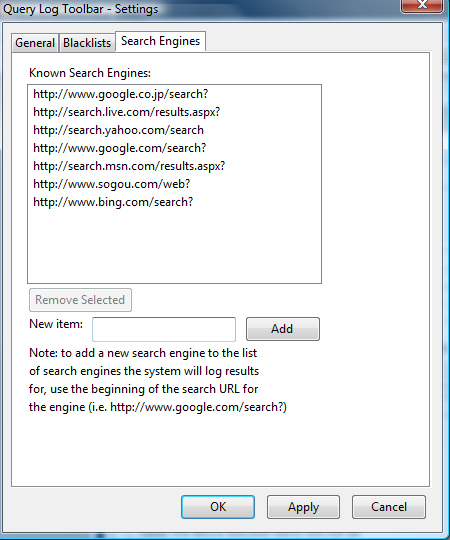
From there, you can add a new URL prefix to watch by typing in the prefix into the "New item:" textbox and pressing the Add button. To remove a URL prefix, select the prefix in the list above and press the "Remove Selected" button.