Using the Lemur Toolkit API
with Visual Studio
Contents
- Standard Installation
- Building applications using Visual Studio .NET
- Compiling the Lemur Toolkit with Visual Studio .NET
Standard Installation
The lemur applications, libraries, and include files will be installed in the selected target directory where you installed the Lemur Toolkit (default is C:\Program Files\Lemur\Lemur 4.12), with the applications in the subfolder bin, the library lemur.lib in the subfolder lib, the include files in the subfolder include. The installer can add the bin subfolder to the search path to facilitate running the lemur applications.
Building applications using Visual Studio .NET
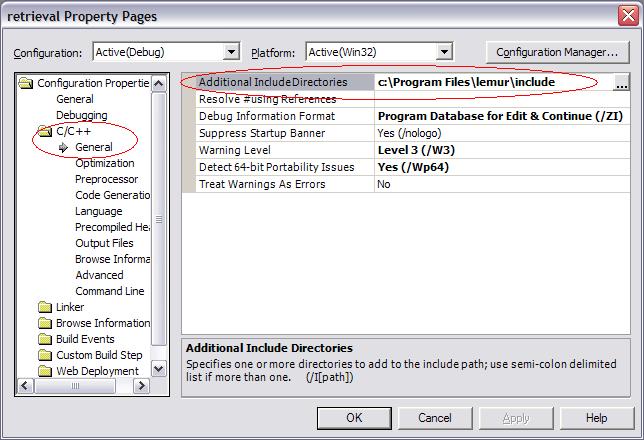
After installing the lemur toolkit, you can use the library by adding the subfolder include of the target directory to the "C/C++ / General / Additional Include Directories" property for your project:
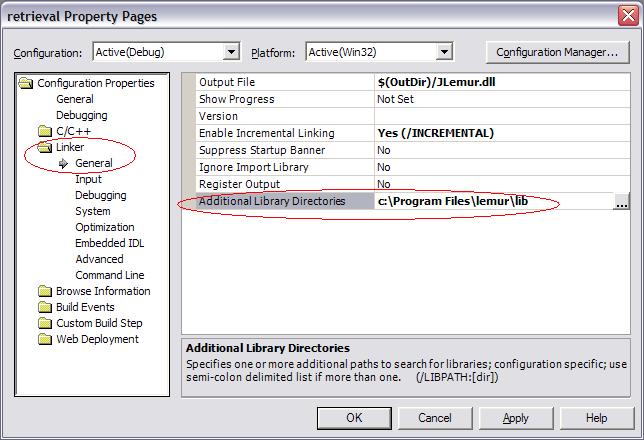
Next, add the subfolder lib of the target directory to the "Linker / General / Additional Library Directories" property for your project:
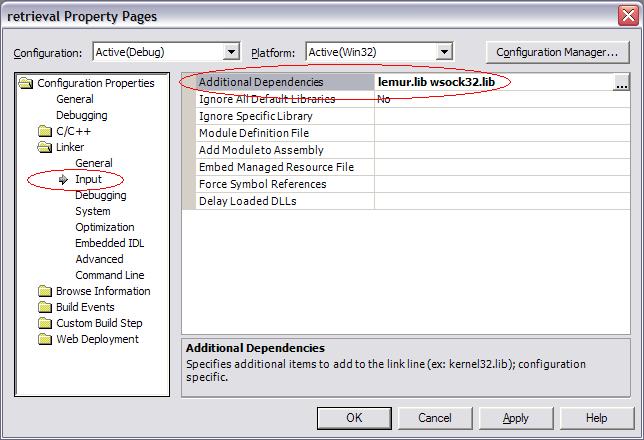
Next, add lemur.lib and wsock32.lib to the "Linker / Input / Additional Dependencies" property for your project.
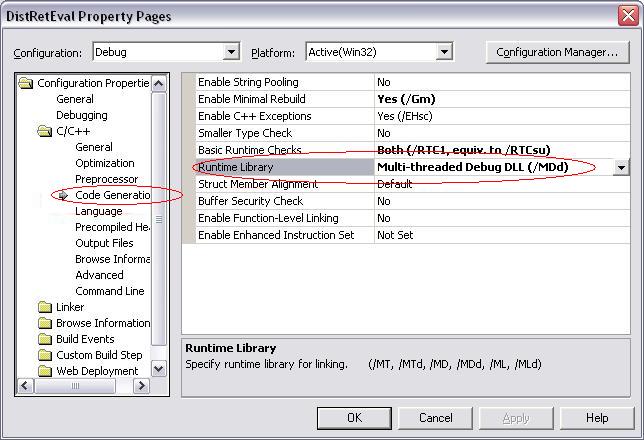
Also, if your project is configured as "Debug", you should choose the "Multi-threaded Debug DLL(/MDd)" runtime library. If your project is configured as "Release", you should choose the "Multi-threaded DLL(/MD)" runtime library. The installable Lemur Library and applications were built in Release / Multi-Threaded mode.
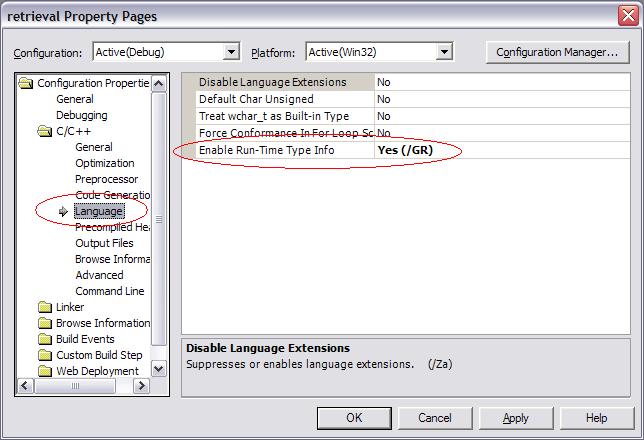
Finally, you should have C/C++ Language Enable Run-Time Type Info set to yes.
Compiling the Lemur Toolkit with Visual Studio .NET
The installer can optionally install the full Lemur Toolkit source tree, placing it in the "src" subfolder of the target directory, depending on which version(s) of Visual Studio you have installed. That folder contains the Visual Studio solution file "Lemur.sln". There is a separate project file for each library and for each application in Lemur.
By default the project configurations are built in "Debug" mode. To change this so that it compiles with fewer warnings and runs at higher efficiency, change the configuration setting in the "Build" menu. Then choose "Configuration Manager". In the menu for "Active Solution Configuration", choose "Release".
When built from source, there is a separate library for each of the sub-libraries that are compiled into "lemur.lib". The combined library, "lemur.lib", is built in the lemur subfolder, with output in either Release or Debug, depending on configuration.